Showing posts with label crafts. Show all posts

Saturday, February 21, 2009

Creating Hope

I took some of this and came up with these....


They are going to my Mom. She will be able to take them with her to treatments if she wants or just leave them home where she can see them. I pray they help her through the next few months.

Oh & I know you'll all wonder so here's what I did....

I took 9x12" canvases I got from the Christmas Tree Shop for just over a $1 each (love that store). I used Modge-Podge (love this stuff) to put some pretty scrapbooking paper on two of them. The yellow one is painted with acrylic paint. I printed the vereses out using the Ariel Black font so they were nice & dark & big. Then I used more Modge-Podge to put them all together. Each canvas has a single coat of Modge-Podge over the top of everything including the "HOPE" words on the yellow one. It's super easy & I put these all together in about an hour. I let them dry overnight.

I just pray they are a blessing to my Mom on this journey she just started.

Tuesday, February 10, 2009

Chocolate Yumminess

Okay, so I will admit to being halfway through this project when I realized I should be taking photos & sharing about this yumminess!

Last week it was decided to thank all of our MOPPETS workers. Our MOPS group meets weekly & all of our child care workers are volunteers who come back week after week to care for our children so that we moms can have two hours to recharge. They are awesome!

Every mom was asked to bring six items (pampering type things) to add to baskets given out to the adult workers and some money to put towards some gift cards for the teens that also help out (most are homeschooled).

In true fashion, I had sort of forgotten this needed to be done. I had bought the stuff to do it, but didn't realize until around 5pm that it had to be done for tomorrow! Yikes! Thankfully it was super easy.

I got the idea for all of this yumminess from Michelle at Her Cup Overfloweth. Her photos look way better than mine btw.

These photos were taken near the end of my chocolate making. I had added some leftover white chocolate melts from Christmas to the red I had picked up for this project & it made a nice pink so I could use my red sugar sprinkles.


Oh yes, details....you all need details....

*Buy Oreos. I bought the generic brand & a few broke. I'd probably buy the real ones next time.
*Melt chocolate melts in the microwave.
*Swish the cookies through to coat half of it.
*Place on cookie sheet covered with wax paper.
*Add sprinkles or other decorations.
*Place in a cold spot to cool & harden (my covered porch works great for this. I discovered it this past Christmas while making chocolate covered pretzels).
*That's it!

I put together seven bags of them. Each had about 10-11 cookies each. I hope the ladies enjoy them! It was super easy & children could probably help. I was moving fast so I banned mine from the kitchen.

Tuesday, January 13, 2009

One Little Word: Projects

I decided to participate in the "One Little Word" project this year. The word I chose was "Family" in an effort to make that my focus this year.

I also decided that just having a word, while all well & fine, wasn't enough. I needed to make it stand out. I needed to make sure it was in front of me at all times - literally. So I did some projects.

The first was easy. Over the holiday season while reading blogs, I came across this....


I know that the blog I found it on was featured at One Pretty Thing but I couldn't find it to link here. The very nice lady who made up the above word art had folks e-mail her for the download. I requested it in brown & in red thinking I would use it but not sure what room I would want to put it in. Oh & I requested this weeks before decided that family would be my 2009 word. It came as a jpeg file & I just had to print it & frame it. I did have to cut it down a tad to fit in the frame & I have it on black card stock. It hangs above my computer desk & I see it every time I walk in to the living room.

This next project I did a few weeks ago & I love it. I've actually done this before but on a much larger scale.

The base of this project is a 9x12 canvas. I found them at the Christmas Tree Shoppe for a mere $1.29 so I picked up a bunch to have on hand for fun projects. I painted it purple (my favorite color) with acrylic paint. First I started out with magazines thinking I would cut out different things to add like a regular collage. That got old fast so then I started going through my stash of scrapbooking things to see what I could find to add to it.

I like how it came out. I had a lot of neat embellishments that actually had something to say about family. I did Modge-Podge the whole top - including all the chipboard elements. I also had some glitter Modge-Podge & I used that to highlight a few words... the "blessed" in "we are blessed," the big "family" in the middle, & the "family matters" in the bottom left.

I like how it turned out & it hangs near the other hanging in the living room. They are good visual reminders of what my focus needs to be this year.

I have one more project in the works & almost didn't post this until I did that one, but decided I'll just show it later - if at all. I'll be making a set of blocks that spells out "family" similar to what I gave my sister & friend, Tammy, for Christmas.

Did you pick a word for 2009? Feel free to share. I love hearing what others are doing.

Wednesday, December 3, 2008

Advent Activity

Last year I made my own Advent calendar for the boys. It was super easy. I bought a kit through Oriental Trading. It was 25 little boxes that I put together & then it had stickers to add - the numbers & some letter ones that spell out a nice little saying on the top. I drop in three pieces of chocolate for each day & the boys love it.

This year I took it to the next level. Sorry, I've always wanted to say that.... ::grin:: I've been reading about how some folks add in fun activities for their kiddos to do each day. I finally managed to get that figured out & added to our advent activities. I'm not sure how the boys feel about them at this point, but so far they are willing participants - for the most part.

Our first day had us making peanut butter & birdseed pine cones. B willingly gathered some but did not want to do the PB & seed part - neither did J. That left N & I making them & they were fun - messy - but fun.

I hadn't actually planned to do a big post on this so there aren't as many photos of us making these as I would have normally taken.

They are super easy though. The boys went outside & gathered 3-4 pine cones each. We let them dry out by the fire since they were snow covered. Then we covered them with peanut butter (using a knife - I'm sure it would have been far easier to put some PB on a plate & roll the pine cones, but...).


After they were all gooey with peanut butter we rolled them in bird seed. As the last step I tied on a piece of bright yellow yarn.


N was pretty proud of what he accomplished. We hung them on a branch we could see from the house. I'm not sure if the birds have found them yet.


Click HERE to read up on some more kid craft ideas for December (winter/Christmas/holiday themed ideas).


Monday, September 22, 2008

Texture Touch

This is another idea I gleaned from Trish Kuffner's book The Toddler's Busy Book. It's called Texture Touch.

To make you need the lids off of juice cans. (Thanks Tammy & Phil for bringing juice on Saturday!!!) You will need white glue, scissors, a pen, and various items for different textures. I am using sandpaper, fabric, fun fur yarn, feathers, rocks and cotton balls.


Fill the juice lid with glue. (Okay, I probably went overboard as these are still not completely dry two days later, but I want to be sure they are on there well so the babies can't yank them off in one pull.)

Place your item on the lid. I started with the fun fur. Some tips about the other items. Fabric: I cut a large square & glued it on to the lid. When it was relatively dry, I used the scissors to trace around & cut off the extra. Sandpaper: I drew a rough circle on the back using the lid as a guide & cut out. My sandpaper was folded & kept popping off the glue so I used a soda can to hold it down while it was drying. I just placed some wax paper on first so I didn't glue the can to the sandpaper. Feathers: Cut them down to fit the lid. Rocks: Only allow your toddler to use these under supervision in case a rock comes off.

Here are my final lids. I may or may not put some magnets on the back. Miss L loves playing with magnets on the fridge so I may go that route.

Friday, December 14, 2007

B's Bears

A few weeks ago, B came to me & asked if he could make some stuffed bears to give away as gifts. I told him I would look in to. I saw a kit while I was shopping early in the week but it would only do one & I knew he wanted to make at least three or four (or more!).

Shortly after that a link was shared at one of my groups. It was in regards to a Charlotte Mason styled nature & art kit. I was intrigued so I went to check it out. I was even happier when I saw the kit! It's very cool & I did end up buying one. They are made by a college student & she sells them at her blog, Hearts and Trees.

I scrolled down to see what other things might be there & struck pay dirt! There was an entry there on how to make stuffed bears including step-by-step instructions and a pattern. I printed it off and told B about it. He was so excited!

He went in to the art supplies & found some felt we had & immediately sat down to get started. I only helped him a tiny bit. I did a bit of cutting & threading his needle for him. I also helped him get started with the sewing, but he did 95% of the bear. I think he did a great job. He worked on it until he finished it & then did another one the next day. I timed him on the second bear & it took him about two hours from start to finish. Then he made a list of felt he wants me to buy. This makes me one pretty happy mama.


Saturday, November 11, 2006

Craft Fair Update

Yuck & double yuck!! Blah! Can you tell what type of day I had? [grin]

My sister & I have yet to go to a fabulous craft fair. Well, let me say that we did have a TON more people come through but they were just not buying today. I guess we need to find the demographic who wants to buy our product. At first I was wondering if it was just US, but then the other vendors near us started saying how slow their sales were too so that did make me feel a bit better.

It WAS nice to spend the day with my sister. However, my littlest one was home with Grammie with a fever so I was mentally in two places.
Grammie handled it without issue & had it all under control so I was fine staying there. He is doing better tonight, but is still "off" & full up with meds. Right now he is watching VeggieTales - his absolute favorite show right now. It's currently King George & the Duckie. He knows it almost by heart. Yes, he's 2 but sings the theme song & even says some of the lines. Too cute.

Friday, November 10, 2006

Craft Fair Season

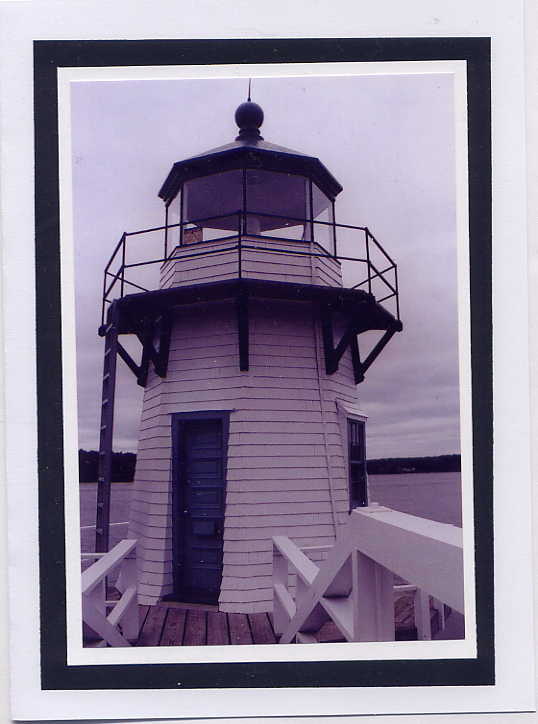
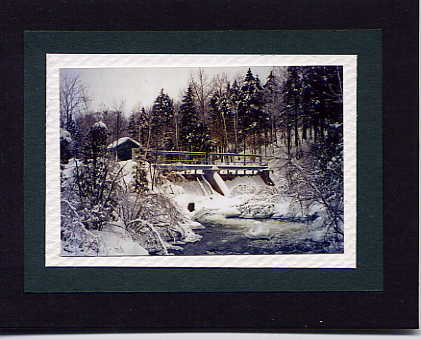
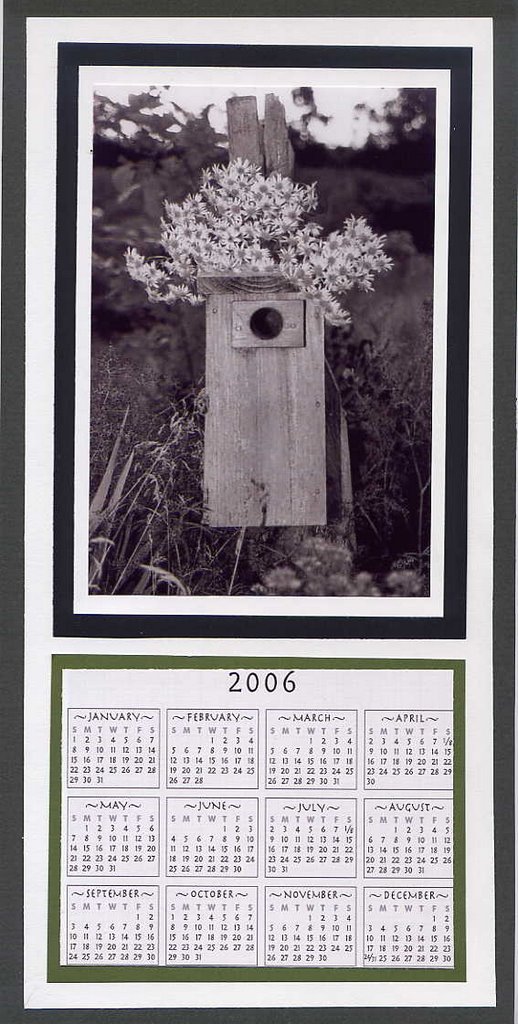
Tomorrow my sister & I will be heading off to our first large craft fair. I can't wait! About two years ago we came up with the idea to turn some of our better photos into greeting cards. From there we have expanded to magnets & calendars. This year we are also trying out framed prints & Christmas cards as well. Here is some samples of what we make.


Doubling Point Lighthouse - card


Bear Brook in Greenville, Maine - magnet


A birdhouse that was at our old house.


In the past we've sort of scrambled to get in to craft fairs. We seemed to always be a step behind. We've never been able to get in to the really big ones. You know, the ones where it's wall-to-wall people & they keep coming from the time it opens until it closes? This year, though, we seem to have finally managed it - hopefully! Tomorrow we'll know for sure.

We are doing one tomorrow at a local elementary school near my sister (about 1-1/2 hours from me). We were on a waiting list & got a call that they had an opening. Yippee!!! Then next month we are doing another large one. They had a waiting list as well. The second fair sends out registration forms to everyone who was in it last year & gives them two weeks to respond. Then they move on to their waiting list. We are on the ball this year & were on the waiting list for both fairs & got in - yeah!!

We're both very excited & have been working on product for the last couple of weeks. We ordered 80 Christmas cards from Snapfish. They came out VERY nice. We have two shots of snow-covered branches (fir & plain) & used those. I also made up prints of the lightening photos I have posted on my first blog http://www.homeschoolblogger.com/berrypatch/191048/ that we'll be selling as framed prints. I only did the first two. We're hoping they go well. Actually, we're hoping we have a banner day! I'll be sure to post & tell everyone how it went.